If you are new to a place and don’t know much about the neighborhood, then you can use Strava to create new routes for you. Strava uses GPS technology to show you tracks and routes and helps you to keep track of your activity. Moreover, you can use someone else’s route on Strava as well, in case you do not want to create yours. This tutorial will teach how you can create routes and use them on Strava. So, let’s get started. Recommended Read: Runkeeper Vs Strava
Create A Route On Strava
Earlier this facility was only restricted to the web, but now you can use the Strava app available on both Android and iOS platforms to do the same. However, for creating a route on mobile, you would require a premium membership. If you are a normal user then creating a route on the Strava website is your only choice.
1 Create A Route On Strava1.1 On The Web1.2 Create Route On Strava Mobile App1.3 Use Someone Eles’s Route On Strava1.4 Conclusion
On The Web
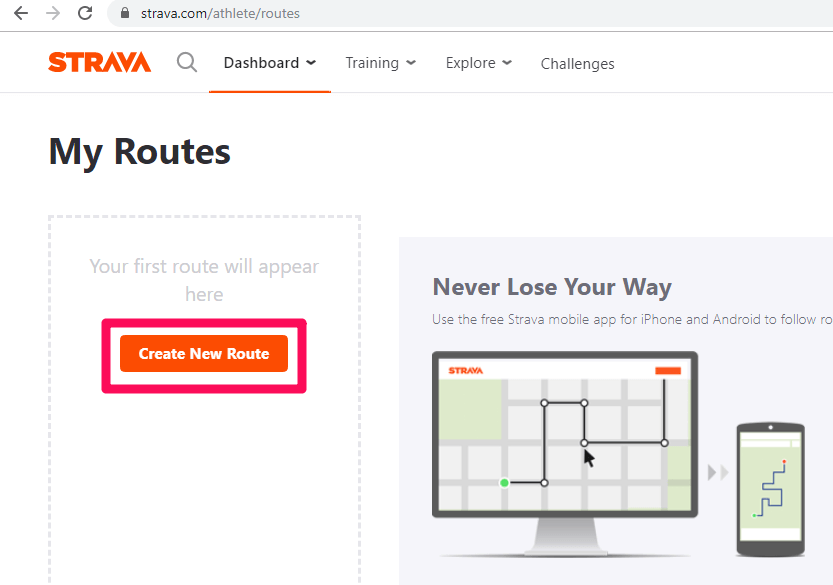
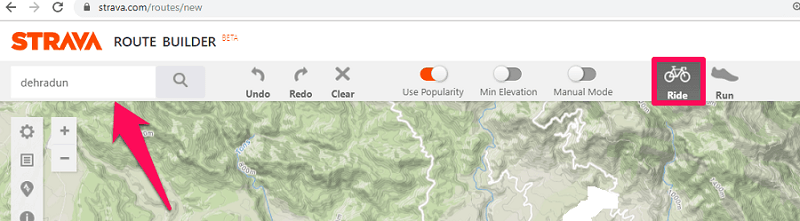
Vist Strava on your desktop and login to your account. On the homepage select Dashboard > My Routes.
Now under My Routes click on the Create New Route button.
On the next page, Starva’s Route Builder will open. Here type your place or locality in the search bar at the top left corner and hit enter. Now select your activity (Ride or Run) from the right side of the toolbar.
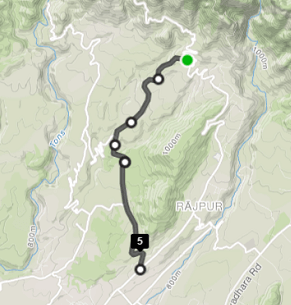
You can zoom in and out of the map by scrolling the mouse wheel or using the Plus(+) and Minus(-) button. 4. Now to create a route, click on a trail or path, you can create as many waypoints on the path to create a route. The starting point will be shown by a green dot and the rest of the waypoints will be shown in white.
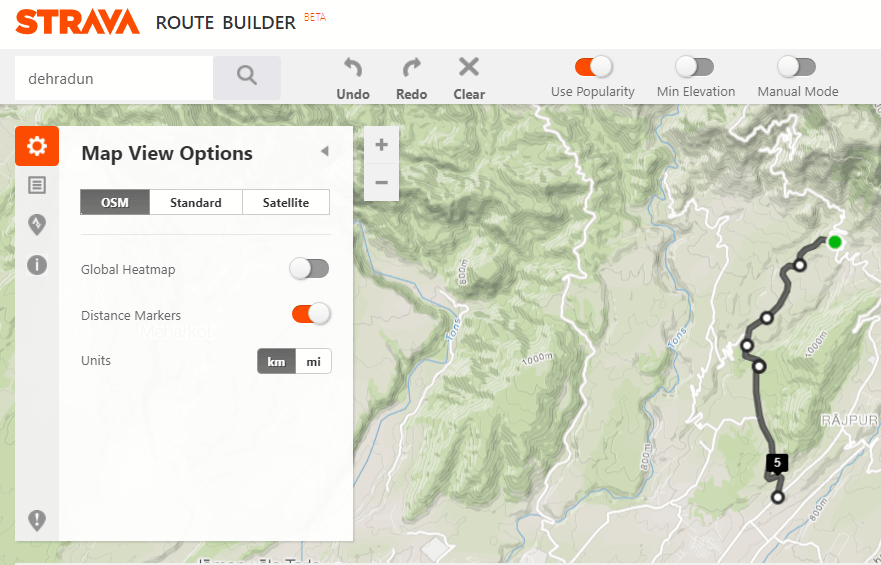
Note: Keep the Popularity slider ON to see the most popular routes for riding or running in your place. 5. You can further customize your route by clicking on the gear icon at the top left corner. Here you can choose the unit(km or mi) which you want to display on your map. Also, select whether you want distance markers or not, and you can also enable Global Heatmap to see the most popular places for outdoor activities near you.
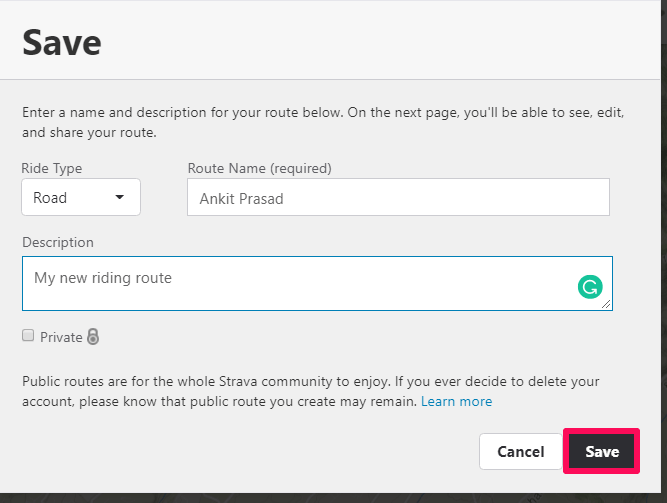
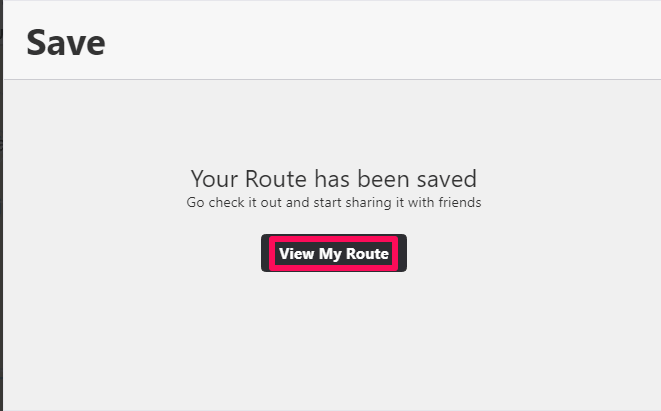
Other than that, you can also change the map view from OSM to Standard or Satellite. 6. Once you are ready with the route, click on the Save button on the top right corner. A pop up will appear which will allow you to name the route and give it a description.
If you want to make this route private then you can check the Private box below the Description field, or else this route will be visible to all the users on Strava. 7. With this, your route is saved. You can click on View My Route button to see your saved route.
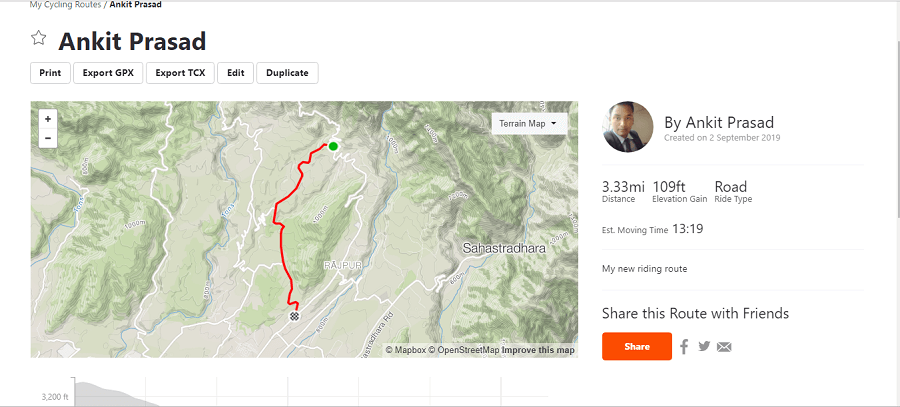
On the next page, you will see the route with an elevation chart beneath it. You can also share, print, export, edit, duplicate your route on this page.
The newly created route can be seen on your mobile app under the Record Activity > Routes section.
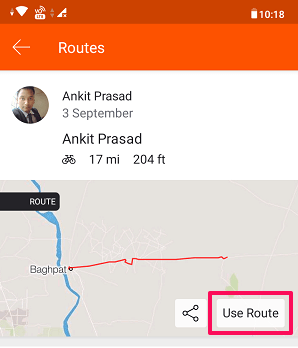
Now on the next page, you will see all the routes created by you. To use any route just tap on Use route.
When you start using a route on the Strava app it will guide or navigate you through the route using the GPS technology. Just make sure you have turned ON the location and mobile data on your phone and then you are good to go.
Create Route On Strava Mobile App
If you have opted for Strava Summit (paid membership), then you can use the Strava app to create a route on your phone itself.
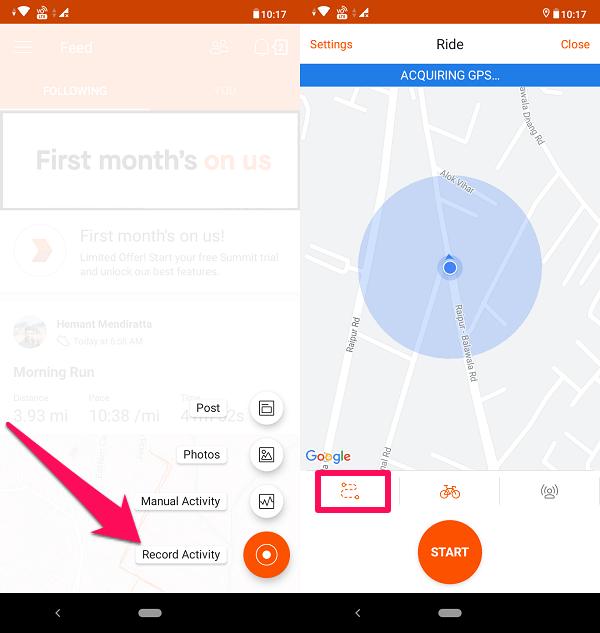
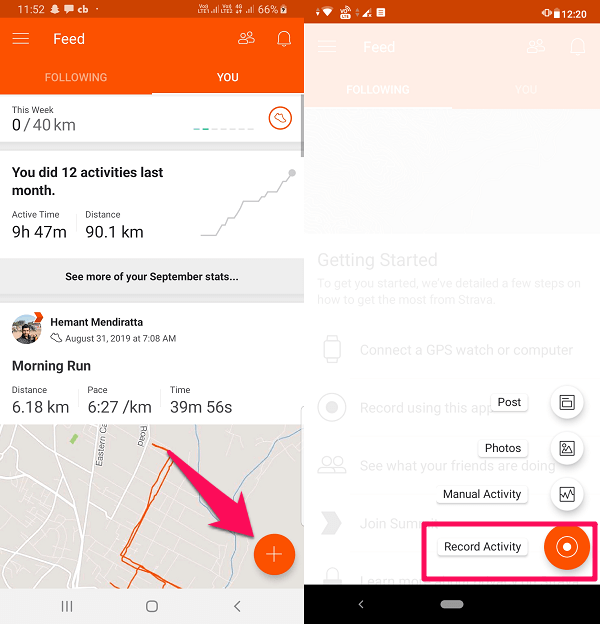
Open Strava app on your phone and tap on the + icon at the bottom right corner. From the options that show up, select Record Activity. If you are using an iPhone then you can simply tap on Record at the bottom.
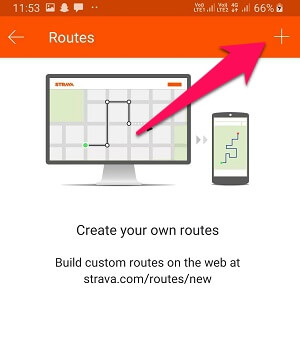
Now select the route icon from the bottom left corner. You can also tap on the shoe icon next to the route icon to change the activity (Ride or Run) for which you want to create the route.
Next, tap on the add icon at the top right corner to create a new route.
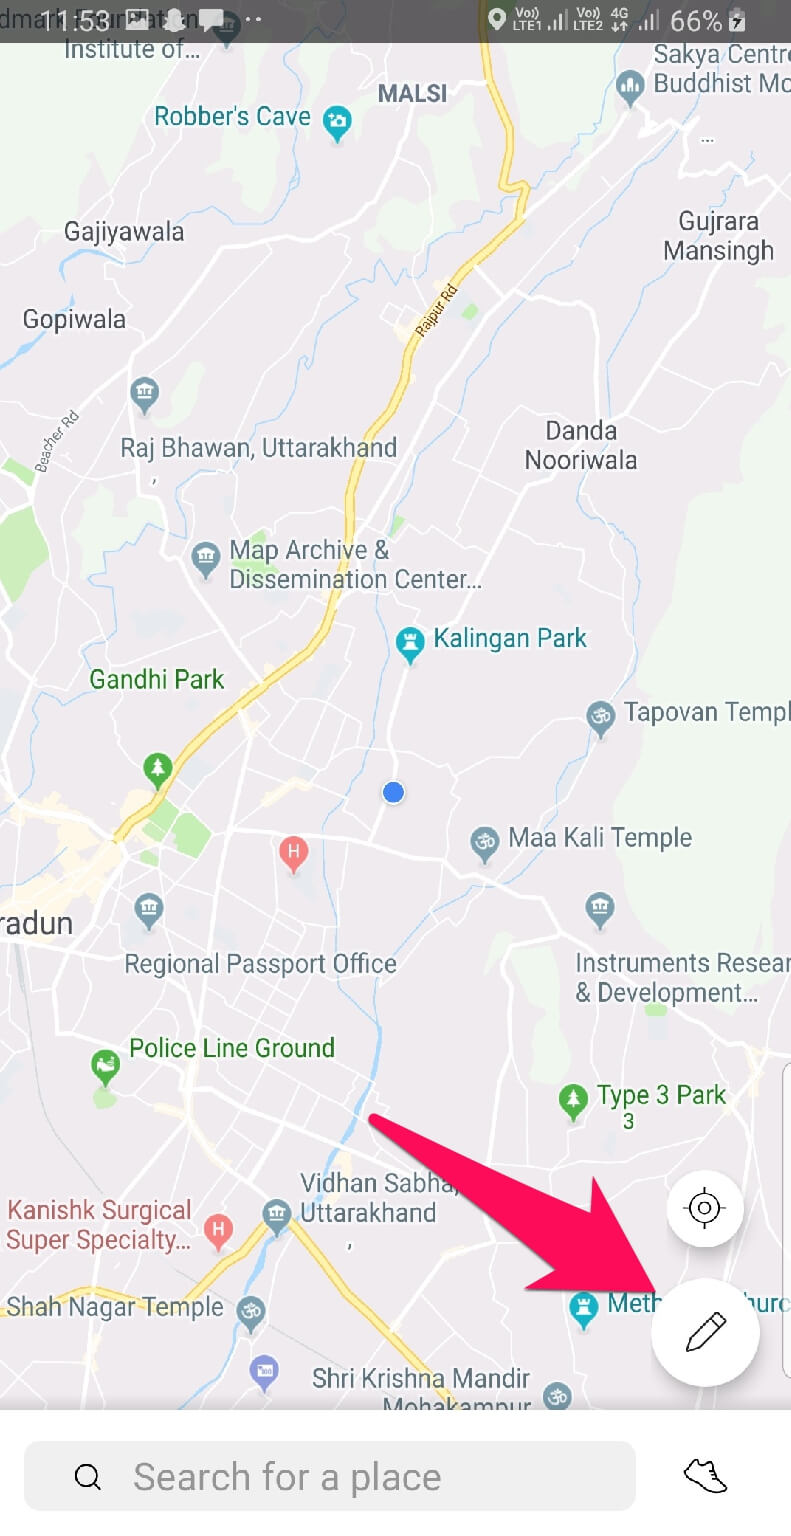
On the route builder screen, tap on the edit icon to create a route.
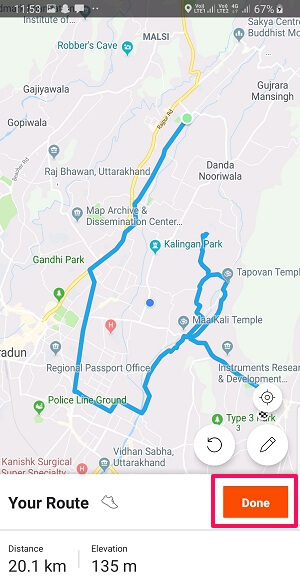
Now swipe your finger over the map and it will show you a route according to that. You can undo the route by selecting the Undo icon next to the edit option. Once you are happy with the route, tap on the Done button.
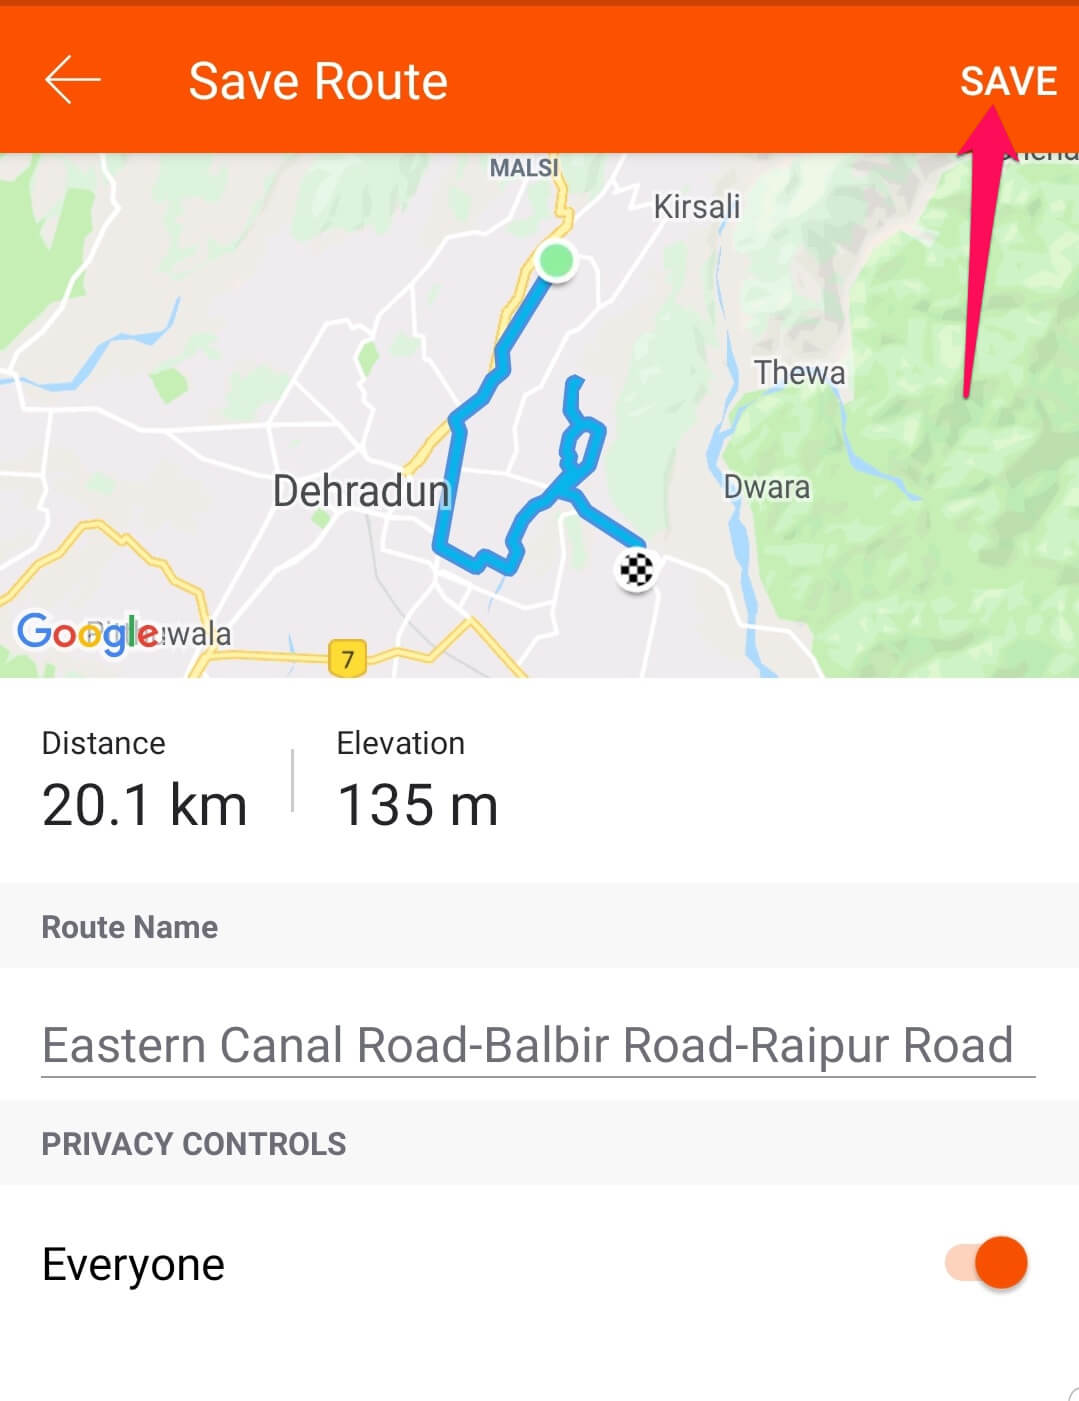
On the next screen, you will see the overview of your newly created route. Now, tap on the Save button at the top right corner to save the route.
Here you can also make this route private by toggling off the Everyone button. Or you can keep it the way it is to make your route visible to all. Also, similar to the previous method the created routes will be under the Record Activity > Routes section of the mobile app.
Use Someone Eles’s Route On Strava
If you do not want to create your own route on Strava then you can use an already created route by your friend or someone else. Note: If someone has created private routes then their routes will not be visible to you.
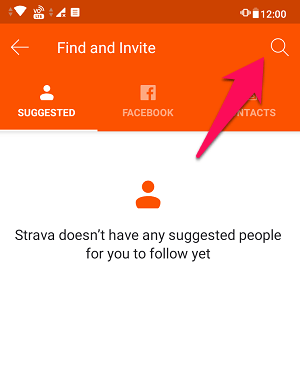
Open the Strava app on your phone and tap on the people icon at the top right corner.
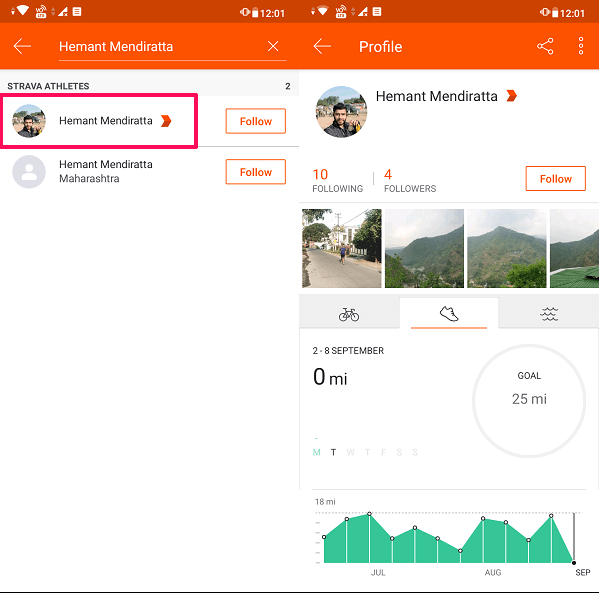
Now tap on the search icon to find your friend or an athlete on Strava. Or you can select the athlete you are already following on the app.
Once you find the athlete, tap on their name and you will be redirected to their profile.
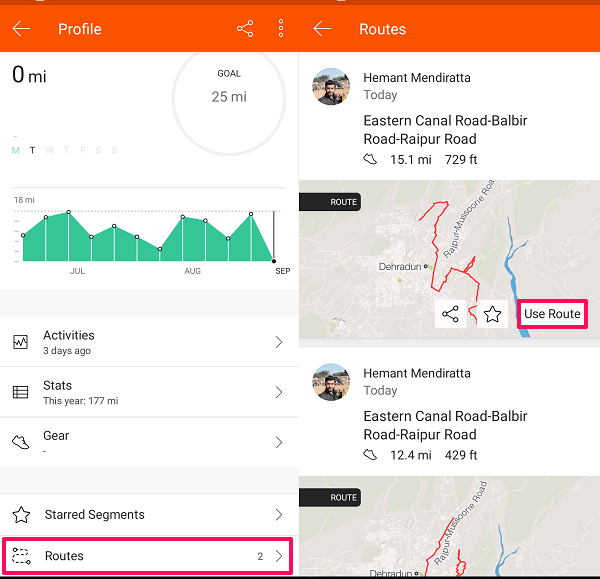
Now under their profile, scroll down and tap on Routes at the bottom. On the next screen, you will see all the routes created by the athlete. To use any route, tap on Use Route.
So, this is how easily you can use someone else’s route on Strava. Recommended Reading: Best Cycling Apps
Conclusion
If you wish to live a healthy and fit lifestyle, then you should definitely include running or cycling in your daily routine. Also, with the Strava app now you can create new routes and record your activities and share it with your friends. This overall makes your outdoor activities more fun and happening. We hope you liked our tutorial and if you do, then share it with your fellow runners and riders as well. Save my name, email, and website in this browser for the next time I comment. Notify me of follow-up comments via e-mail.
Δ
![]()
![]()