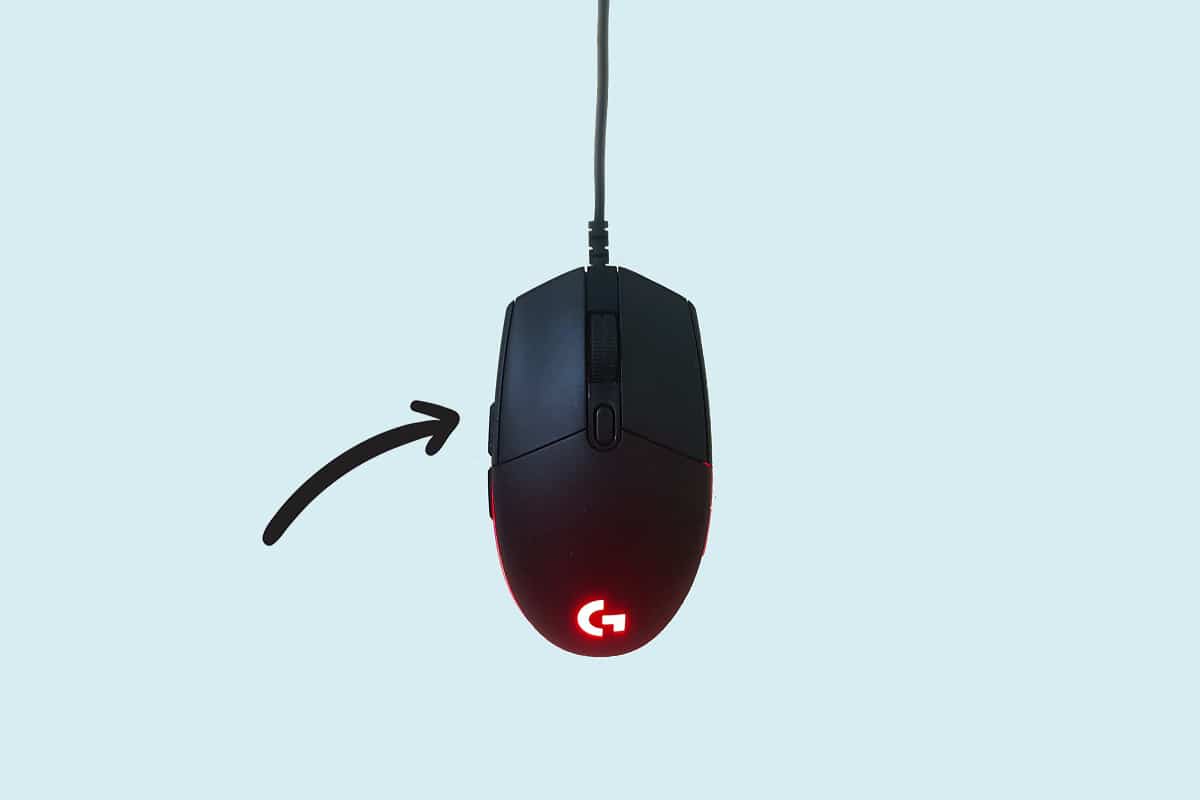
You can remap your mouse buttons to various settings like:
You can use the default settings on your device to reverse the button functions. You can also disable your mouse button to avoid accidental touch. Also, you can assign macros to the mouse buttons using Microsoft Mouse and Keyboard Center.
Note: Macros are nothing but a series of events, like delays, keypress, and mouse clicks, to perform a function in repeat mode.
How to Reassign Mouse Buttons on Windows 10
Following are the methods to reassign or remap mouse buttons to keyboard keys.
How to Reassign Mouse Buttons on Windows 10 Option 1: Reverse Mouse Buttons Option 2: Reassign Across all Apps Option 3: Reassign for Specific Program Option 4: How to Set Macros for Mouse Buttons Option 5: How to Repeat Macros for Mouse Buttons How to Disable Mouse Buttons
Option 1: Reverse Mouse Buttons
If you are not a right-handed person, then you would prefer swapping the functions of mouse buttons. Here’s how to reassign mouse buttons in Windows 10 PCs:
Press the Windows + I keys simultaneously to open Windows Settings.
Then, select Devices settings, as shown.
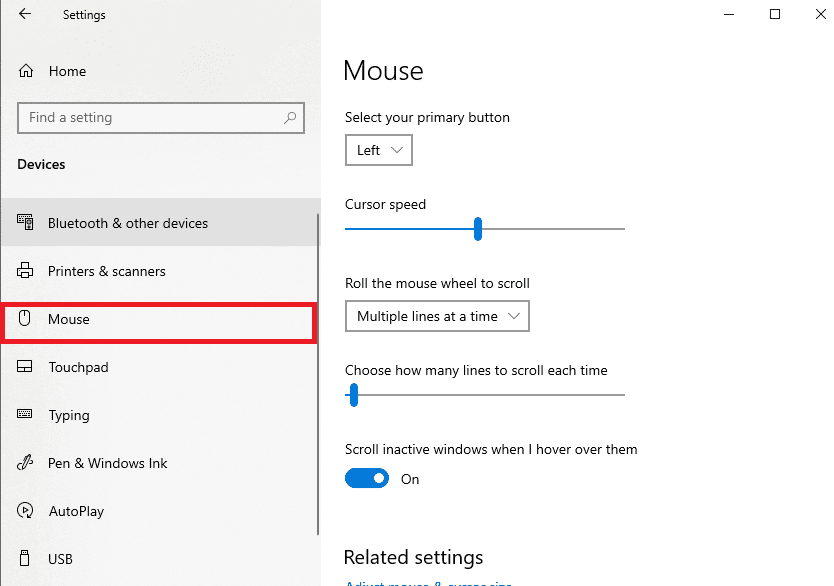
Go to the Mouse settings menu from the left pane.
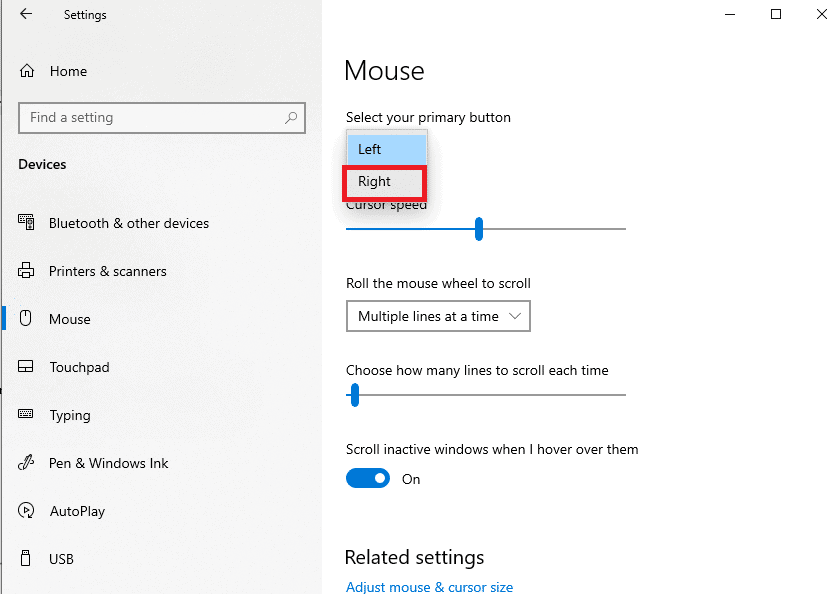
Select your primary button from the drop-down menu as Left or Right, as depicted below.
This will reassign mouse functions from the left button to the right. Also Read: Fix Mouse Wheel Not Scrolling Properly
Option 2: Reassign Across all Apps
Note: Microsoft Mouse and Keyboard Center works only for Microsoft mice and keyboards. Using Microsoft Mouse and Keyboard Center, you can reassign or remap mouse buttons to keyboard keys as follows:
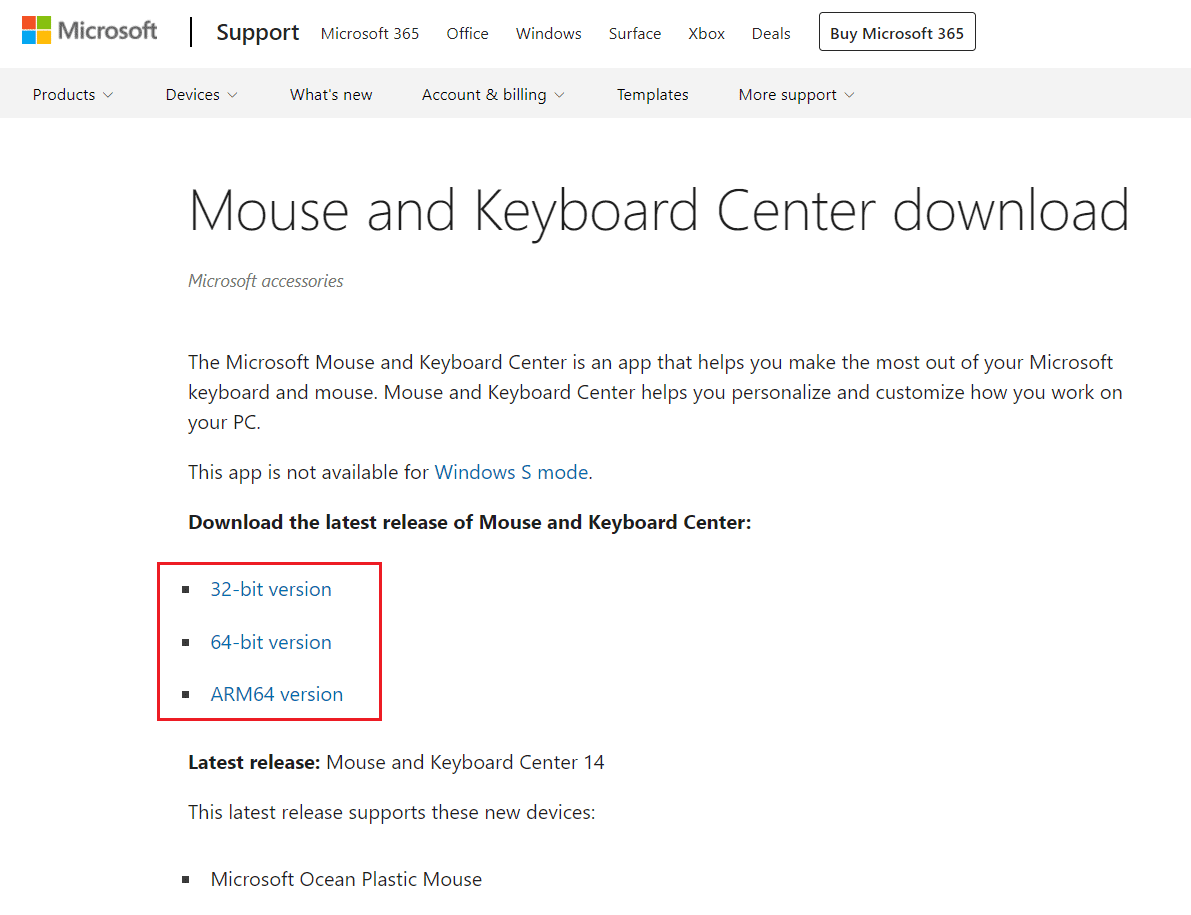
Download Microsoft Mouse and Keyboard Center compatible with your Windows PC from the Microsoft official website.
Then, run the downloaded setup file by double-clicking on it to install the program.
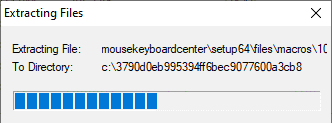
Wait for Windows to extract the files then, automatically install the program.
Now, Microsoft Mouse and Keyboard Center app will run automatically, as shown.
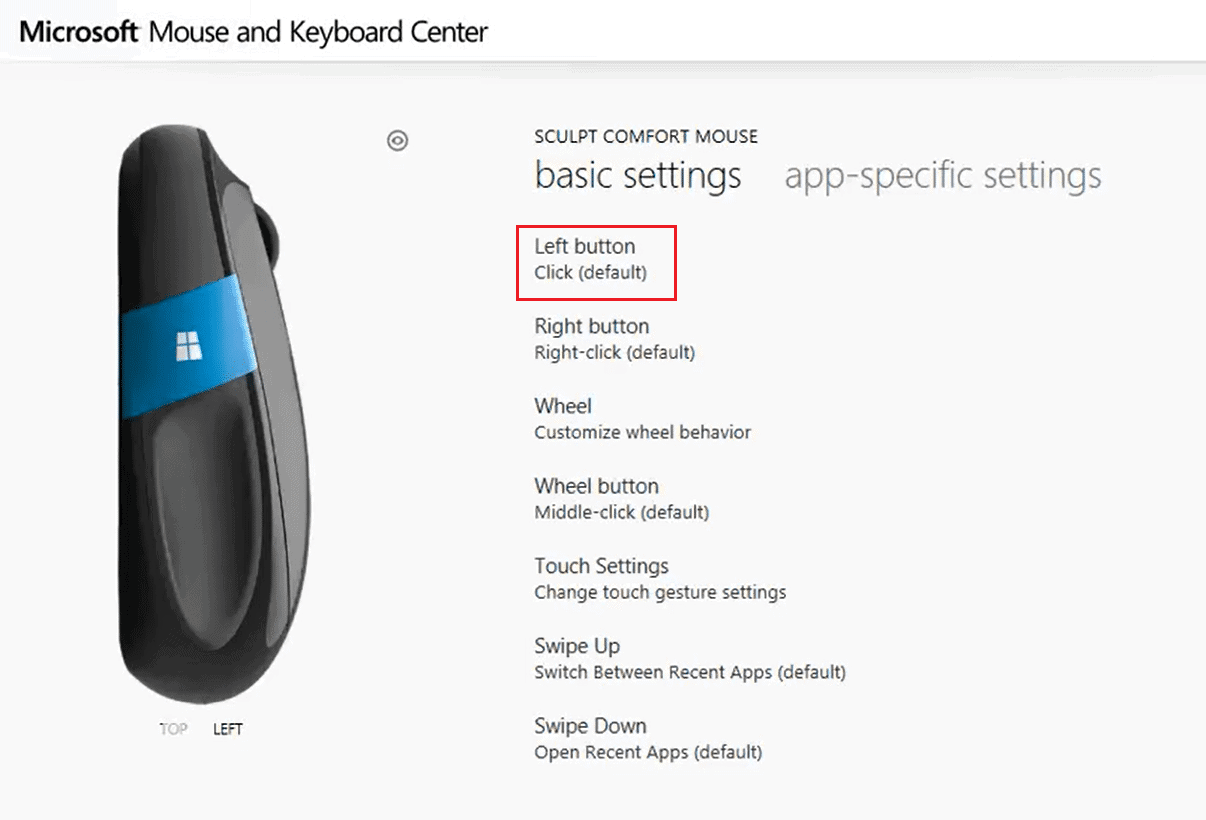
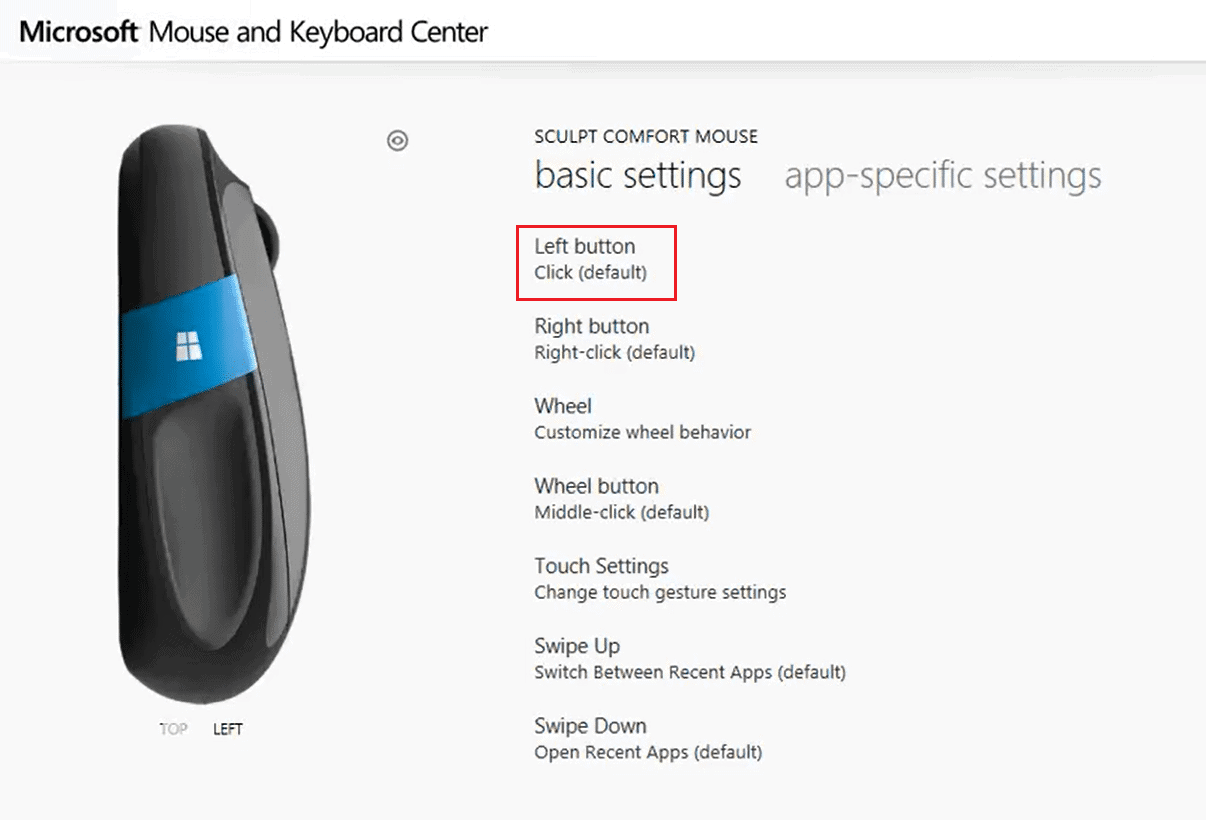
Click on basic settings.
Choose the option Click (default) given under the Left button as shown highlighted.
Choose the command for various options under the following heads as per your requirements:
Most-used commands, Gaming commands, Browser commands, Document commands, Key commands, and others.
Also Read: How to Disable Mouse Acceleration in Windows 10
Option 3: Reassign for Specific Program
You can reassign mouse buttons in Windows 10 for specific applications too. Note: The program or Windows OS should not be run as administrator for the commands to work for a specific program.
Hit the Windows key, type Microsoft Mouse and Keyboard Center, and click on Open.
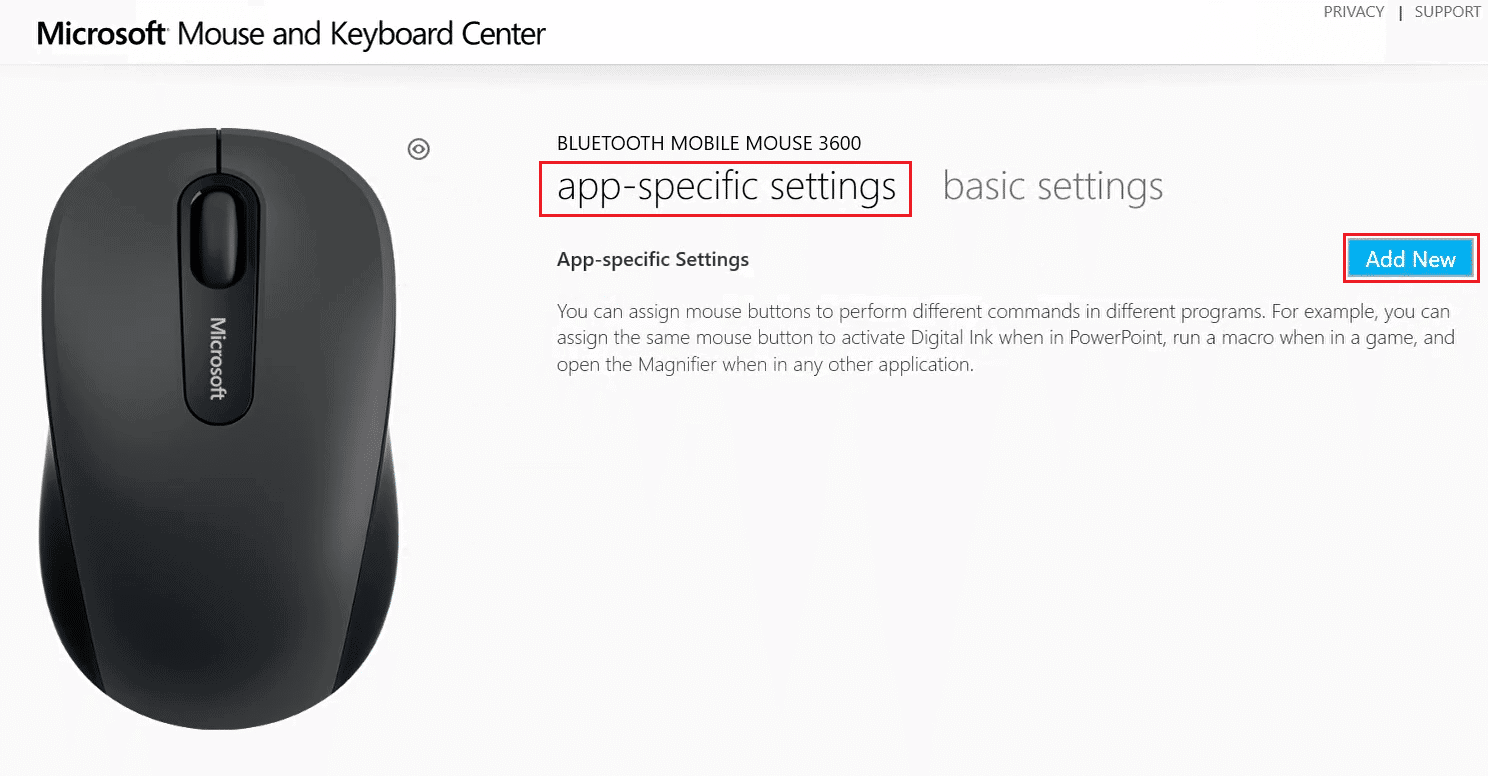
Go to App-specific settings and click on the Add New button shown highlighted.
Choose the desired Program from the list. Note: Click on the Manually Add a Program at the bottom, if your desired program is not in the list.
Now, in the button command list, select a command. Hereon, you can open this specific program with the newly assigned button. Hence in this way, you can reassign mouse buttons on Windows 10. Easy, isn’t it?
Option 4: How to Set Macros for Mouse Buttons
You can also set a new macro for a mouse button using Microsoft Mouse and Keyboard Center as explained below:
Launch Microsoft Mouse and Keyboard Center by searching for it as before.
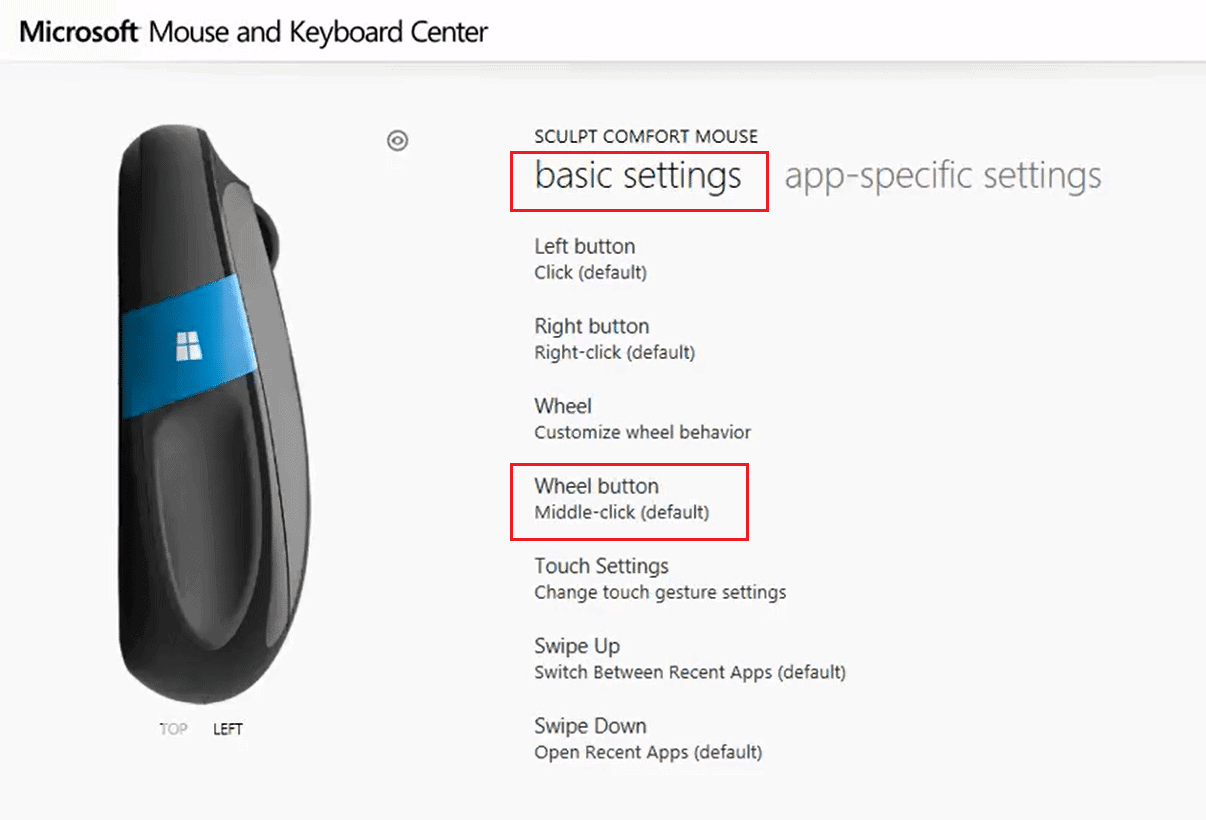
Under basic settings, click on the Wheel button as shown.
Choose Macro from the list.
Click on the Create a new Macro button as shown.
Type the name for the macro in the Name: field.
In the Editor: section, press the keys needed for the macro. Note: You can also choose from the Special Keys section displayed on the screen. For example: Enter Y and choose right-click on the mouse from the special keys below. This combination will perform the wheel button task here onwards. This is how to remap mouse buttons to keyboard keys on Windows 10 PCs. Also Read: Fix Logitech Mouse Double Click Problem
Option 5: How to Repeat Macros for Mouse Buttons
You can also make a macro repeat itself unless it is stopped by the user. Ways to stop repeating action of the macro include:
switching between applications, or, pressing another macro button.
Follow the given steps to set macros in repeat mode:
Launch Microsoft Mouse and Keyboard Center and navigate to basic settings > Wheel button as earlier.
Choose Macro on the next page.
Click on the pencil icon i.e. Edit Macro icon to edit the previously created macro.
Turn the toggle On for Repeat mode to enable it till stopped. Note: If you choose the Toggle option in Repeat mode, press the assigned keys to start or stop the macro. Also Read: How to Fix iCUE Not Detecting Devices
How to Disable Mouse Buttons
Moreover, Microsoft Mouse and Keyboard Center allows you to disable a specific mouse button. Here’s how you can do so:
Open Microsoft Mouse and Keyboard Center and go to basic settings.
Click on the option Click (default) under the Left button, as shown.
Choose the command titled Disable this button to disable it. Also Read: How to Fix Mouse Lag on Windows 10 Q1. Is there any third-party tool to remap and customize mouse buttons? Ans. Some famous tools to remap and customize mouse buttons are:
X-Mouse Button Control, Mouse Manager, HydraMouse, ClickyMouse, and AutoHotKey.
Q2. Do changes made through Microsoft keyboard and mouse center applied to all applications? Ans. Yes, it gets applied to all the applications if the changes are made in basic settings unless you give gaming command to that button. You can also reassign buttons for specific programs. Q3. Can all the mouse buttons be reassigned? Ans. No, specialized buttons in some models cannot be reassigned. The user has to work with their default functions. Recommended:
How to Enable or Disable Mobile Hotspot in Windows 11 Best IP Address Hider App for Android How to Enable Dell Keyboard Backlight Settings Fix Inaccessible Boot Device Error in Windows 11
We hope that this guide helped you to reassign, remap or disable mouse buttons in Windows 10 desktops or laptops. If you have any queries/suggestions regarding this article, then feel free to drop them in the comments section.







![]()
